Patcher は音色のチャンネルでもミキサーのエフェクトスロットにも使うことができます。
ここでは、エフェクトスロットに使う例で説明します。
エフェクトスロット1つ分で、複数のエフェクトを挿すことができることも利点です。
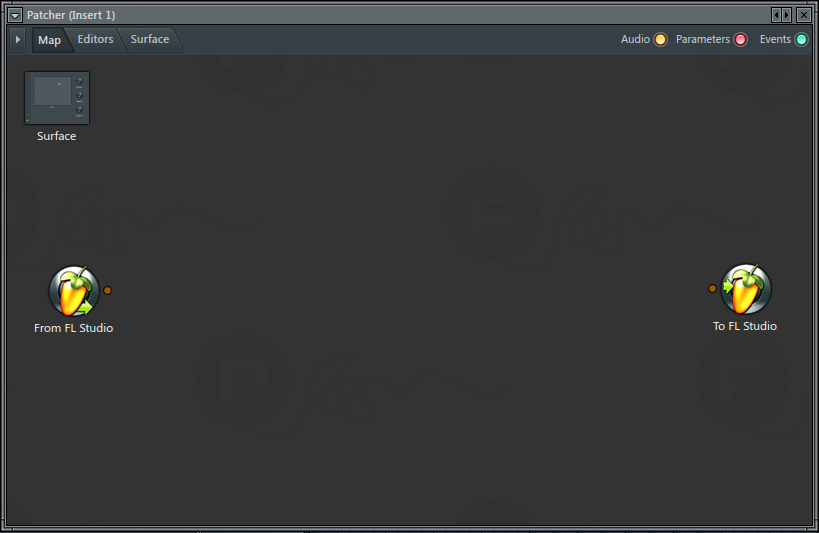
Patcherを追加します。左のFLマークが入力側、右のFLマークが出力側です。
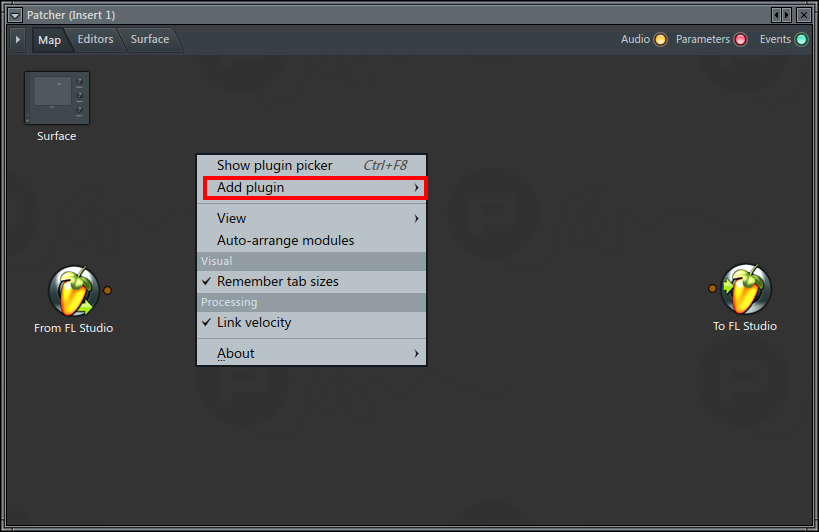
右クリックして、Add plugin を選び、エフェクトを選択します。
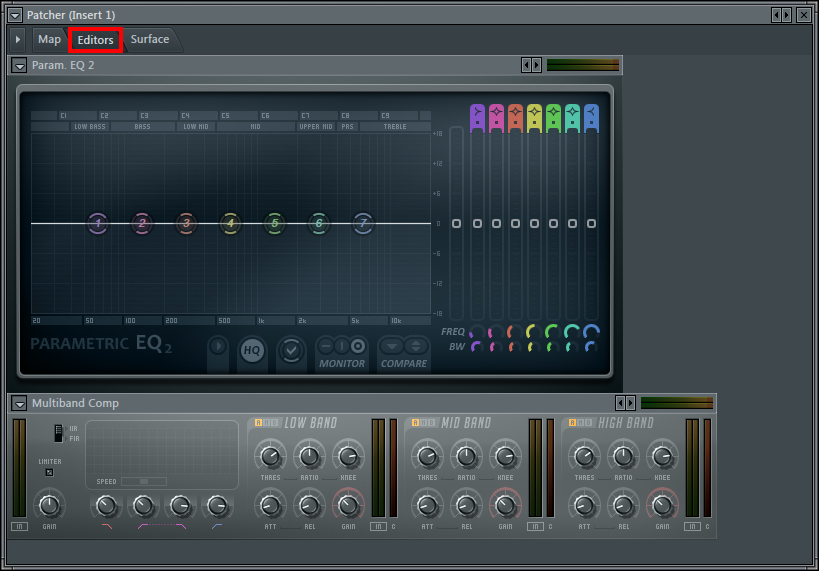
ここでは例として、Parametric EQ 2 と Multiband compressor を 追加します。
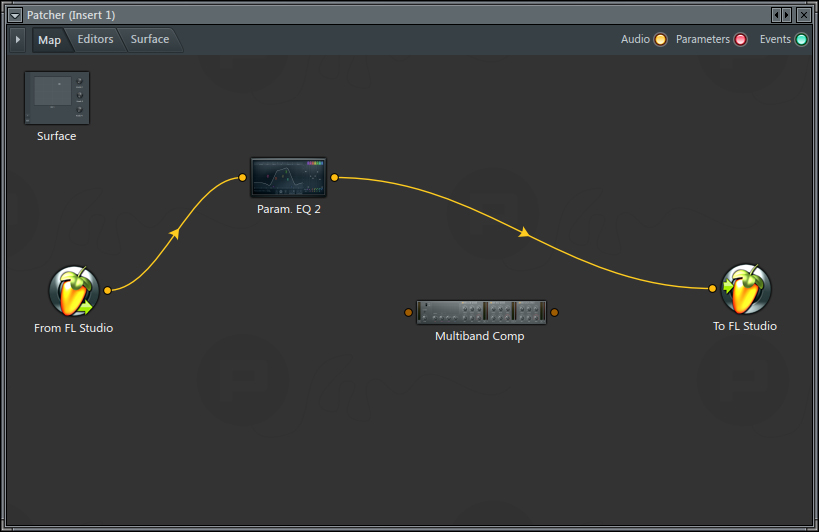
追加するとこのようになります。マウスを使って、
2つのエフェクトをちゃんと通過するように、経路を修正しましょう。
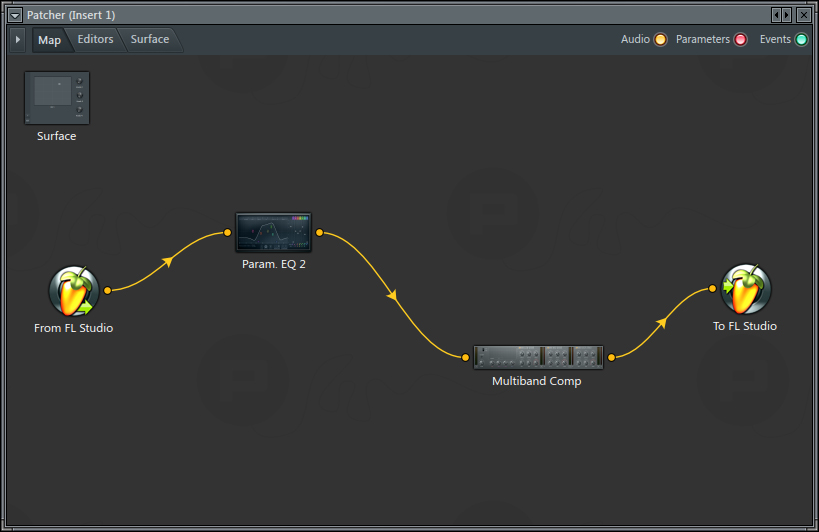
修正するとこのようになります。
音はまず、EQに入り、そのあと、コンプに入って、出力されます。
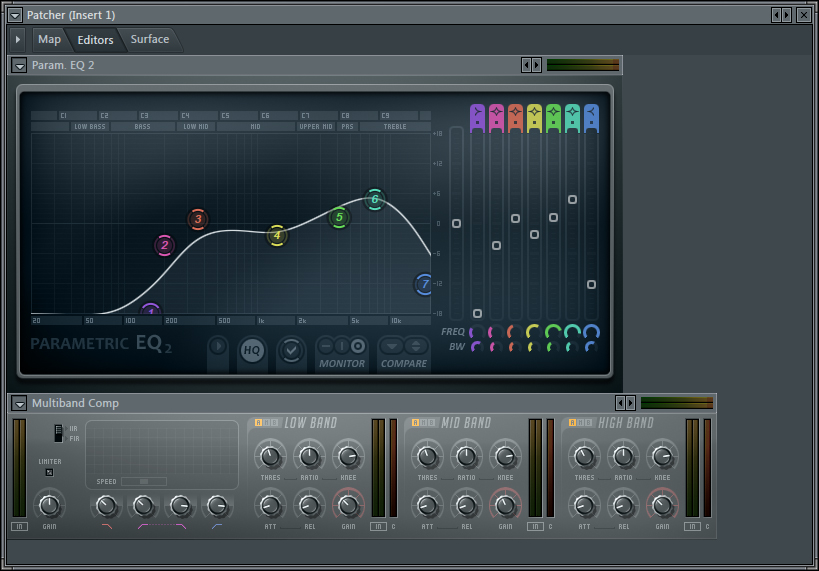
左上のタブを「Editors」にすると、通常通りエフェクトの各パラメーターを操作できます。
適当に設定しました。これで Patcher の基本的な使い方はクリアしています。
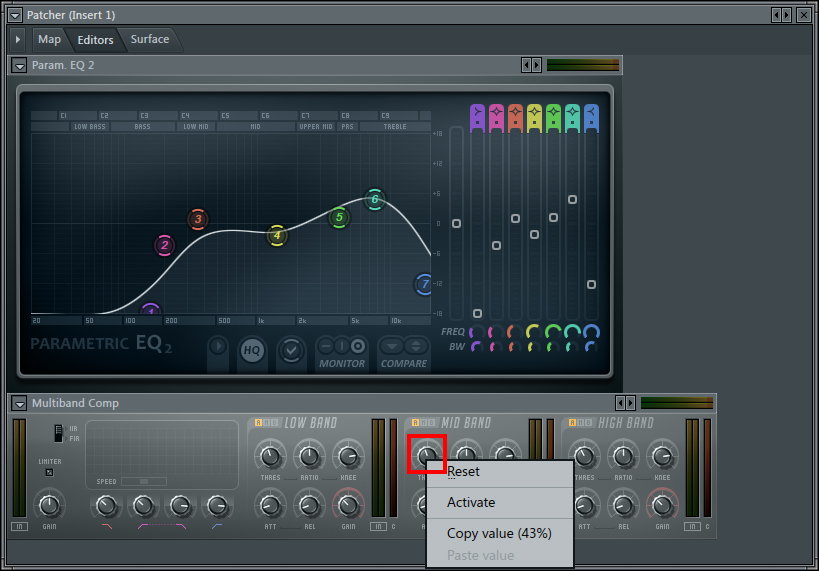
さて、組み立てたエフェクトのうちの一つをオートメーションにしようと、
右クリックしましたが、「Create automation clip」が出てきません。
ここでは、コンプの MID BAND の THRES をオートメーションにしようとしています。
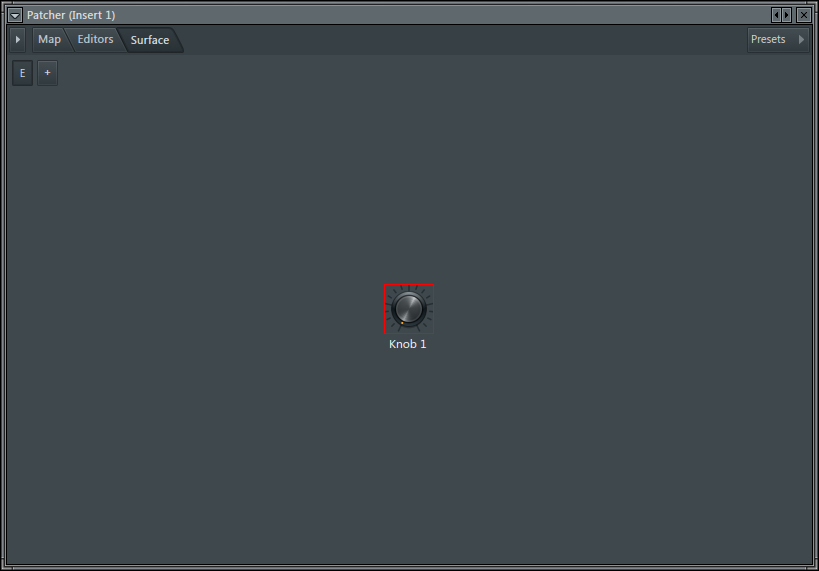
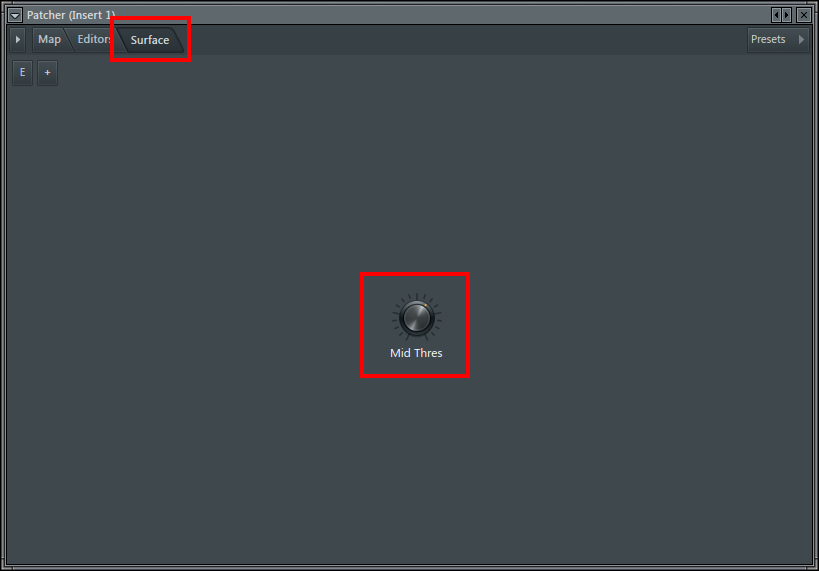
オートメーションを設定するために、左上のタブを「Surface」にして、
「+」ボタンを押し、「Knob」を選択してください。
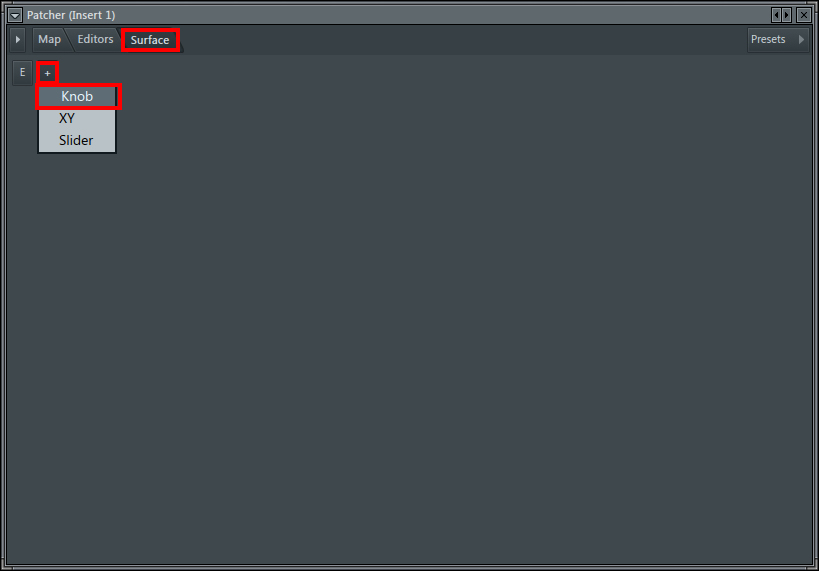
ノブが追加されました。
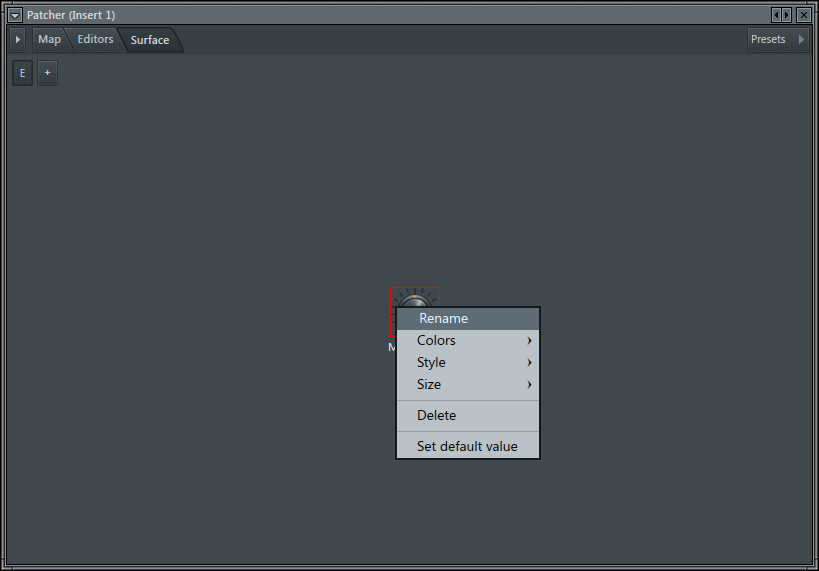
右クリックしてリネームすることができます。MID THRES としました。
左上のタブを Map に戻すと、Surfaceのところに赤いポイントが追加されています。
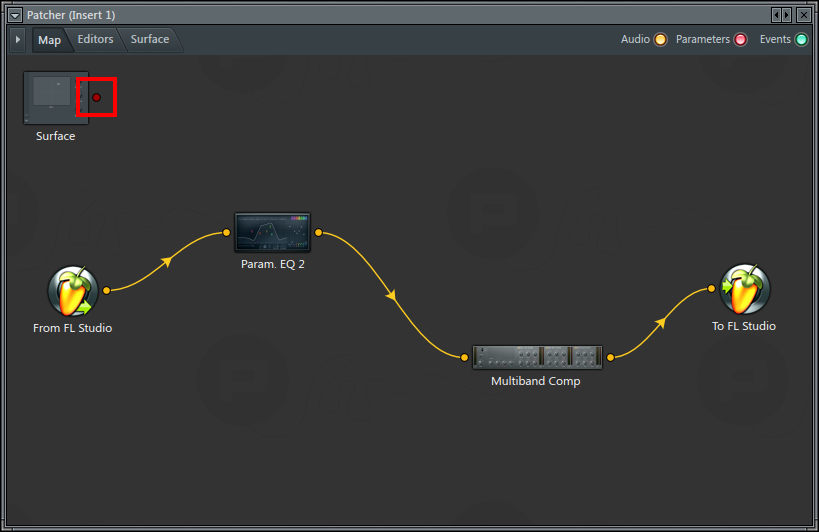
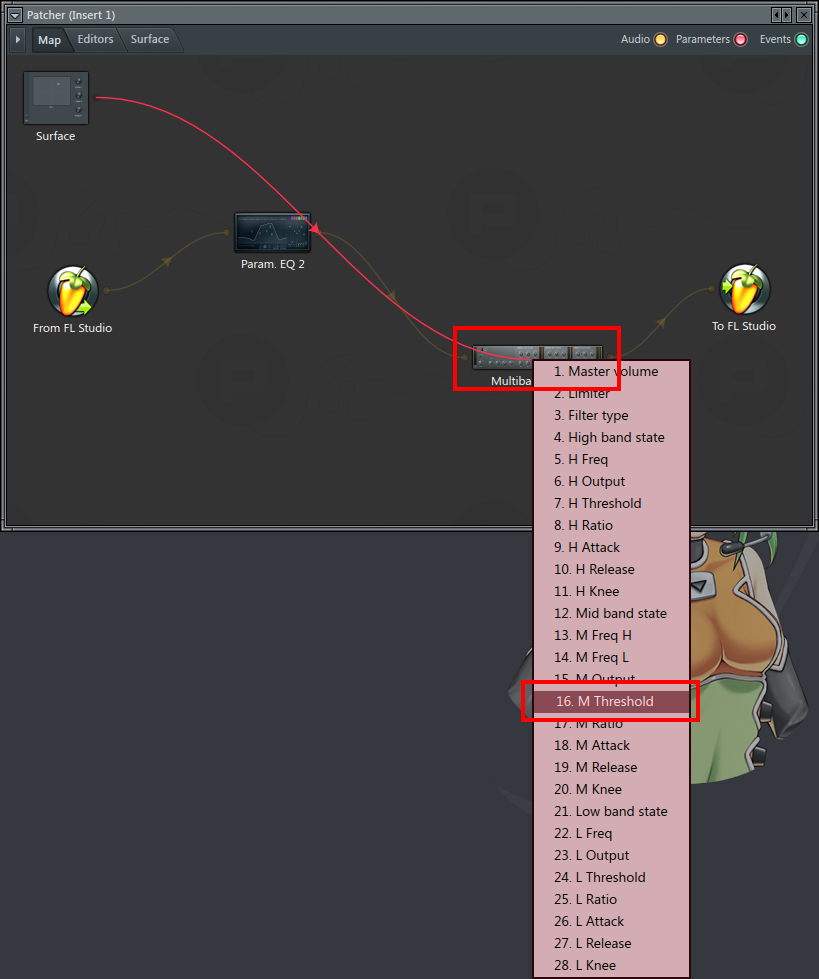
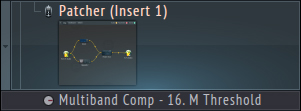
これを、Multiband Comp にドラッグすると、Multiband Comp のパラメーターが
一覧されますので、「M Threshold」を選択します。
これで、追加したノブと、MID BAND の THRES がリンクしました。
「Surface」タブにて、ノブを回すと、実際にパラメーターが変化します。
左上の▼を押して、「Browse parameters」を選択します。
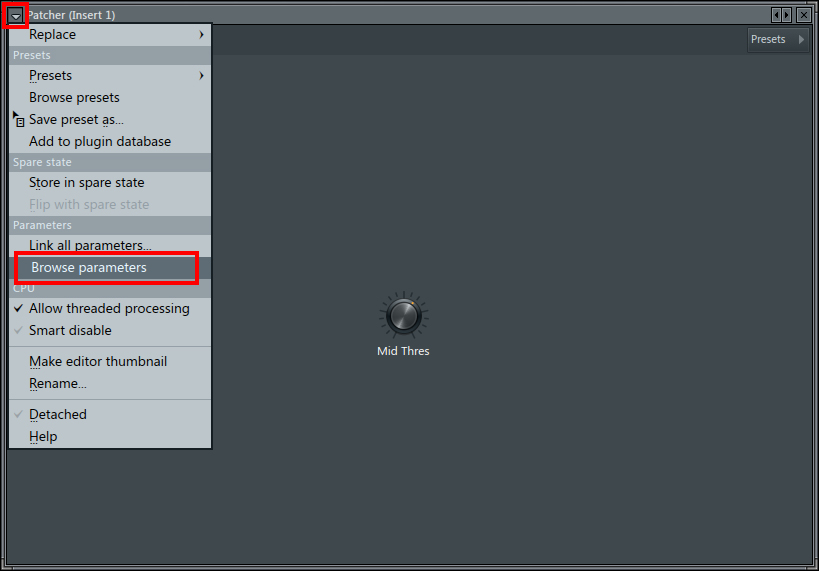
左側のブラウザに、Patcher の Surface 上にあるコントロールが一覧されます。
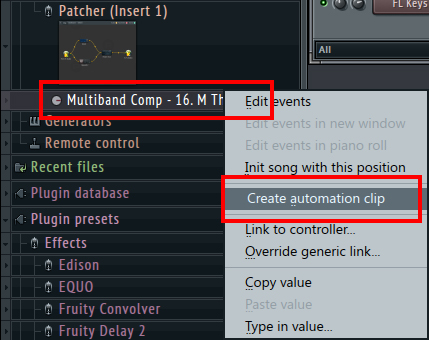
追加したノブのパラメーターを右クリックすると「Create automation clip」が表示されており、
オートメーションを作成することができます。
以上で説明は終了です。
|
